Rails 3.0 with RVM, Nginx and Phusion Passenger
Rails 3.0 is ponies and rainbows! Well, kinda. I've never been into Rails much but 3.0 has brought on some much needed features over previous versions, some of which deserve bullet points:
- Brand new router with an emphasis on RESTful declarations
- Unobtrusive JavaScript helpers with drivers for Prototype, jQuery, and more coming (end of inline JS)
- Explicit dependency management with Bundler
The newest version of Rails came out on August 29 so I decided to jump right in. Since Ruby 1.8.6 and earlier are no longer supported, we'll be using RVM in this article. RVM is a command line tool which allows us to easily install, manage and work with multiple ruby environments from interpreters to sets of gems.
Before we get started, we'll be using a fresh (ve) Server from (mt) Media Temple running Ubuntu 10.04 Lucid Lynx for the install. I should also note that we're not installing a full-featured application -- this is simply a tutorial on how to get the Rails 3.0 test application up and running with Nginx + Passenger.
Prerequisites: You'll need these to get through the entire install process for RVM, Nginx and Phusion Passenger (mod_rails).
aptitude -y install curl git-core build-essential zlib1g-dev libssl-dev \
libreadline5-dev libc6 libpcre3 libssl0.9.8 zlib1g
Now we'll need to do a system-wide install of RVM. For your convenience, the dude that wrote RVM provided a script you can run on most that does all the heavy lifting:
bash < <( curl -L http://bit.ly/rvm-install-system-wide )Every piece of documentation and website I read on this had this particular part wrong. I've updated the correct path from the documentation for the purposes of this article:
echo "[[ -s '/usr/local/lib/rvm' ]] && source '/usr/local/lib/rvm'" >> ~/.bashrc
source ~/.bashrc
Doing so ensures RVM is loaded as a function (versus as a binary), ensuring commands such as rvm use work as expected. Please note that you can confirm this worked correctly by opening a new shell and running:
type rvm | head -n1If this was performed correctly, you should see:
rvm is a functionSo if that looks good, we can continue installing Ruby:
rvm install 1.9.2Now sit back and relax. This took about 8 minutes on my system. To make sure that the system uses this version, we can use RVM for this and install the rails and passenger gems:
rvm --default ruby-1.9.2
gem install rails passenger
Now comes the fun part of installing Nginx. This will grab the stable binary, bake in Phusion Passenger and compile it:
rvmsudo passenger-install-nginx-moduleYou will be presented with two options right from the start. Just choose Option 1 and let passenger download, compile and install Nginx for you. You'll also be prompted to choose a prefix directory. You can leave it as the default, /opt/nginx. When it completes, it should give you some Nginx configuration snippets for your rails apps. Save those as you'll need them later.
Now, you'll want a init script so you can stop/start/restart Nginx. I've provided mine here:
cd /etc/init.d
wget -O nginx http://bit.ly/8XU8Vl
chmod +x nginx
/usr/sbin/update-rc.d -f nginx defaults
We're almost done. Now we can create the test application:
cd /opt/nginx/html
rails new testapp
You'll need to update the Nginx configuration to make sure it's using the right document root now. The file will be located in /opt/nginx/conf/nginx.conf:
sed -i".bak" '47d' /opt/nginx/conf/nginx.conf
sed -i '47 a\
            root   /opt/nginx/html/testapp/public;' /opt/nginx/conf/nginx.conf
/etc/init.d/nginx start
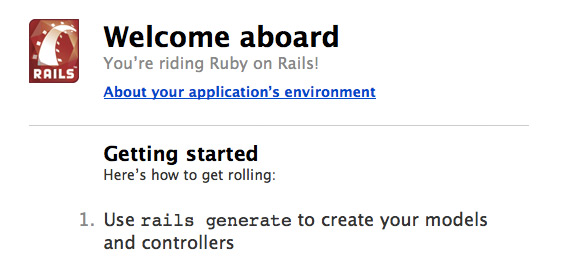
The spacing looks a little weird in that middle sed command for a purpose -- to keep the syntax of the nginx.conf file consistent. Now that we've restarted Nginx, we should see the 'Welcome aboard: You're riding Ruby on Rails!' image:

If you're interested in an all-in-one installation, I've put together the steps above into a simple bash script. Enjoy!